Workspace Windows
The Report Window
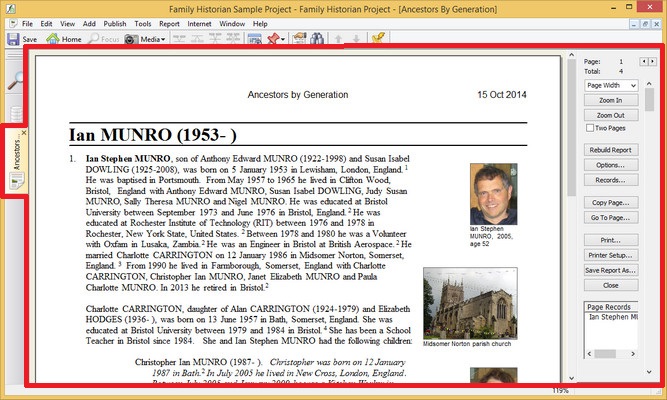
Reports Window (marked in red)
When you select a report from the Publish Menu, a Selector dialog appears prompting you to select one or more records to display in the report. Usually, you can select as many records as you like. When you press , the Reports Window is displayed, showing you a preview of what your report will look like when printed. From here you can browse through it on- screen, or print it (or a range of pages from it). You can also save a copy of it as a PDF File (useful for sending to others), as a Web Page (in HTML format), as a Word-Processor Document (in Rich Text Format - a format used by many word-processors, including Microsoft Word), or in plain text. If you wish, you can copy individual pages to the clipboard, and paste them into other applications. And you can review and change any aspect of the report's content, style or layout.
You are not constrained in any way as to what you can can do while previewing a report. The Reports Window is just one more workspace window in Family Historian like any other. You can switch to any other open workspace window (click on any of the workspace window icons in the Navigation Bar on the left side of the window) without having to close the Reports Window. By double-clicking on the items shown in the "Page Records" list (in the panel on the right), you can bring up the Property Box to view their details and change them if you wish. The Reports Window will update itself immediately to reflect any changes you make.
The Reports Window has a panel with buttons down the right-hand side. These buttons provide commands which are also available from the Reports menu. Which buttons you see will depend in part on your screen size.
The various commands (button and/or menu) relating to reports are described below. are described below.
| Zoom In | Zoom in. You can also specify that you want the window to
display a page width or a full page (see the values in the
dropdown list above the 'Zoom In' button). |
|---|---|
| Zoom Out | Zoom out. |
| Two Pages | Check this if you wish to view 2 pages at once. Odd-numbered pages display on the right. |
| Rebuild Report | If you make changes to the underlying data, while viewing a report, the report will update itself immediately to show the changes. But some aspects of the layout cannot be changed immediately, and in these circumstances, you will be asked to click on this button to rebuild the report before you print it, or save it as a file. |
| Options | Opens the Report Options Dialog. |
| Records | Most reports display data about one or more chosen records. Click this button to change the records that this report is 'about'. |
| Copy Page | Copies the current page to the clipboard. |
| Go To Page | Enables you to jump straight to a specific page |
| Prints the report, or some part of it that you specify. You can also print by clicking on the File > Print menu command. | |
| Printer Setup | For changing printer options, including page size and orientation (portrait or landscape). |
| Save Report As | All reports can be saved as a PDF File, a Web Page (in HTML format), a Word-Processor Document (in Rich Text Format - a format supported by most word-processors, such as Microsoft Word). Reports can also be saved as plain text. Finally you can save a report as a custom report type. This is a useful feature if you wish to preserve a set of report configuration options and re-use them. Custom report types are available from the Publish > Custom Reports menu |
| Close | Closes the Reports Window. |
| Page Records |
This lists all the records for which an entry is being displayed on the current page. You can select any item in this list, and access all the usual functionality for it (e.g. open the Property Box to view its properties or show a diagram for it in the Diagram Window). Double-click on an item in the list as a quick way of opening the Property Box for it. |